We’ve spent the past two weeks showing you some interesting and tasty desserts you can make for yourself: muffins, cupcakes, brownies, and a pudding. As a culmination of all that, today we’re going to feature this awesome and amazing rainbow cake. Making it was an epic undertaking and we had to set aside four or five hours in total to put the whole thing together, so this was definitely an adventure. The result was this tasty and impressive-looking cake, and it’s pretty satisfying to see something so cool and colorful take shape in your own kitchen. We based this cake on a recipe from Bon Appétit and adapted it for ourselves, so we’ll walk you through this entire process and give you the tips and tricks we discovered to help you craft this cake on your own.
To make this, you’ll need:
- Flour
- Baking powder
- Sugar
- 3 eggs
- Milk
- Vanilla extract
- Food coloring
- 3 1/2 sticks of butter
- 2 8-ounce packages of cream cheese
- A 2-pound bag of powdered sugar
- A lemon
- Pearl sprinkles – we used two different colors from Wilton
- Cooking spray
- You’ll also need the following kitchen equipment: 3 8-inch cake pans, parchment paper, a rotating cake stand, and a bench scraper
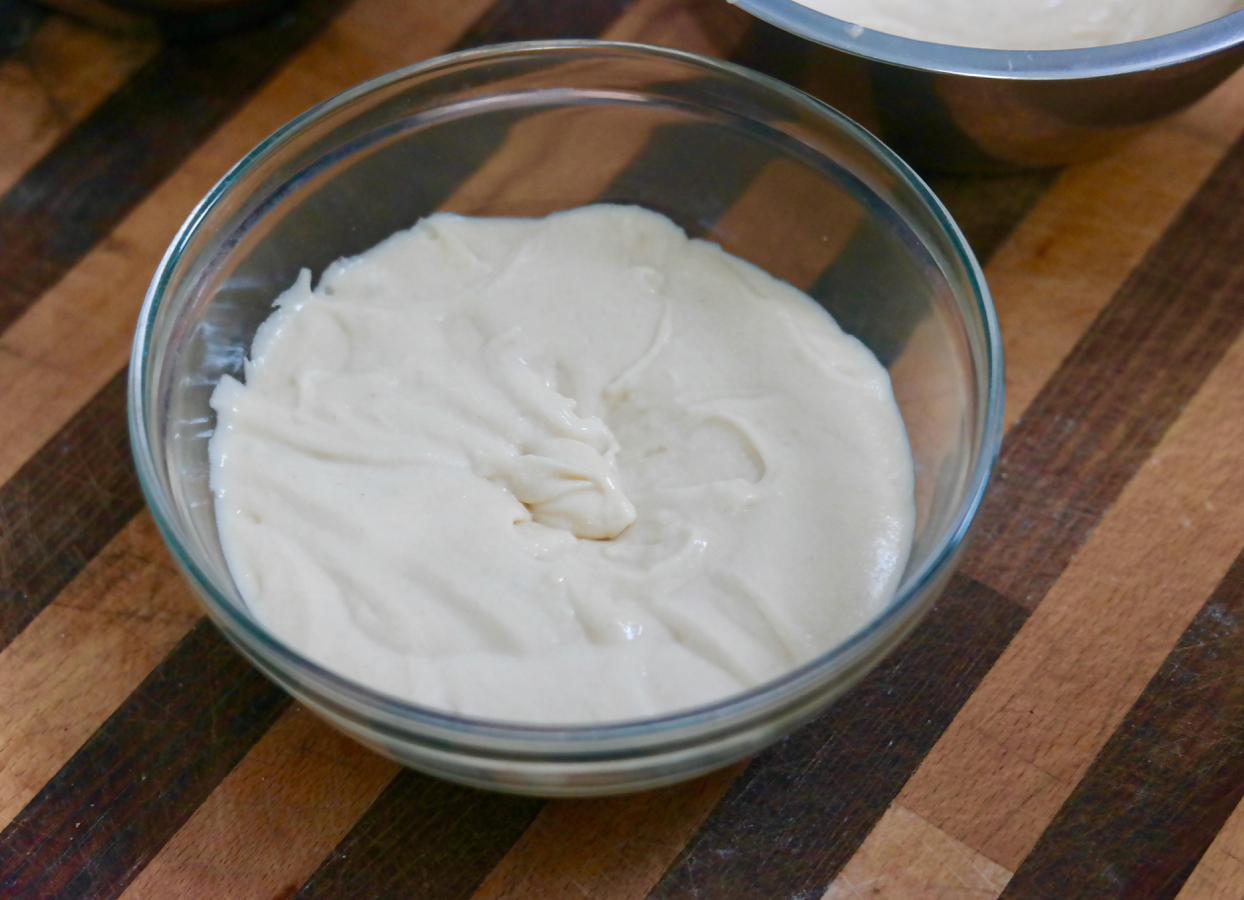
To start on the cakes: place 1 1/2 sticks of butter and 1 1/2 cups of sugar into the bowl of a stand mixer fitted with a whisk attachment and beat the butter and sugar together at a medium speed for about 3 minutes, until you have an airy mixture. Add in each of your eggs, one at a time.
Then stir a tablespoon of vanilla into 1 1/3 cups of milk, and in a separate bowl combine 2 2/3 cups of flour, a tablespoon of baking powder, and a large pinch of salt. Add a third of the flour mixture to the butter/sugar/eggs, combining it in at a low speed, then half of the milk, then another third of the flour mixture, then the rest of the milk, then the last of the flour mixture. Now you should have your batter:
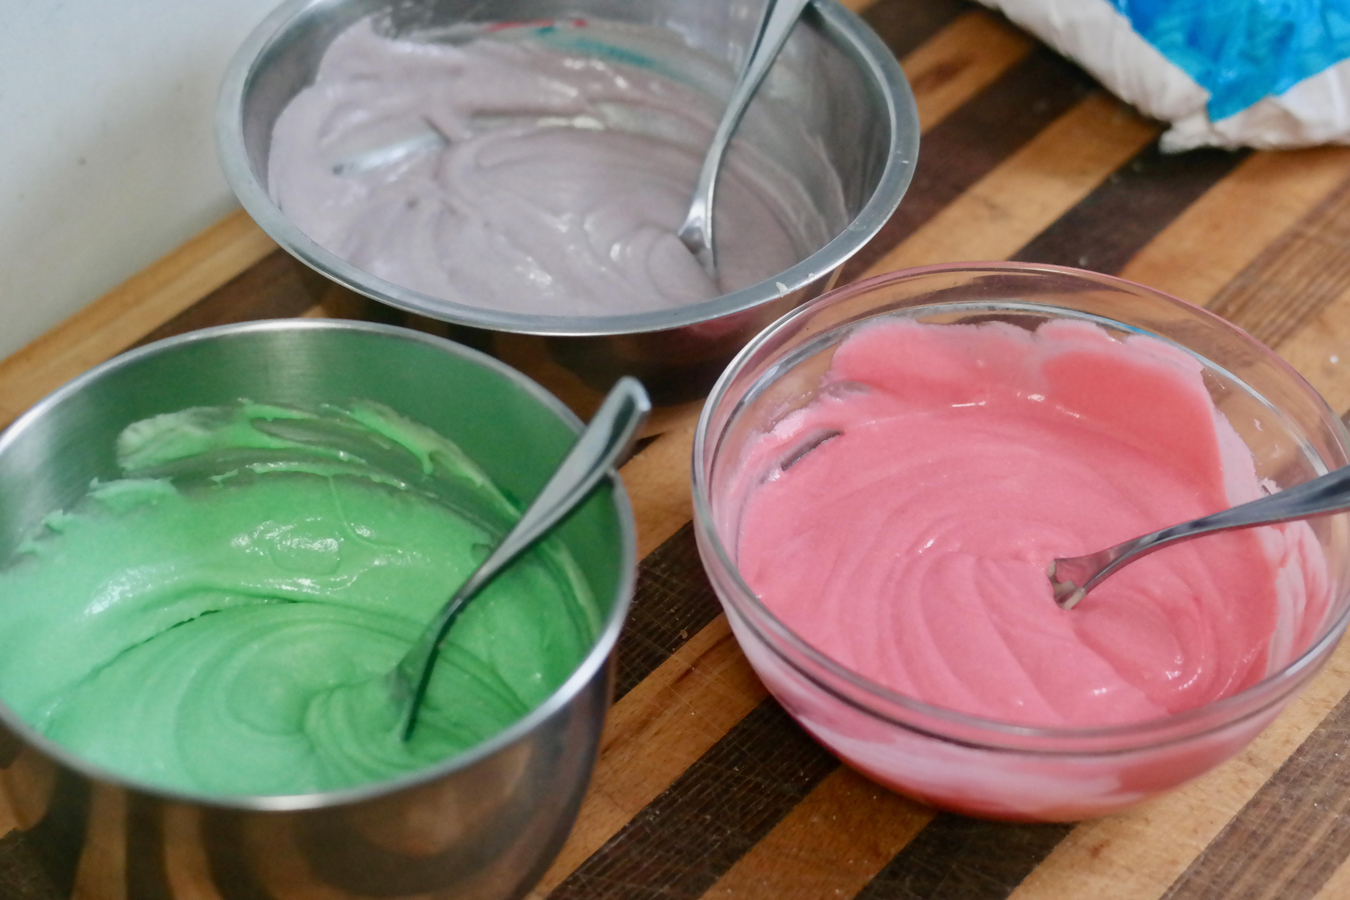
Divide the batter equally among three bowls and dye each one whatever color you’d like.
Now coat each of your cake pans with cooking spray, cut circles out of parchment paper to neatly fit into the bottom of each pan, and do another coating of cooking spray on top of the parchment. Fill the pans with your colored batters and gently tap the filled pans down so you have an smooth surface of batter in each. Bake the cakes at 350°F for 15 to 20 minutes, until you can stick a toothpick into the center of each one and it comes out dry. Let the cakes cool inside their pans for 10 minutes, then use a butter knife to gently loosen them from the pans so they can cool on a kitchen surface.
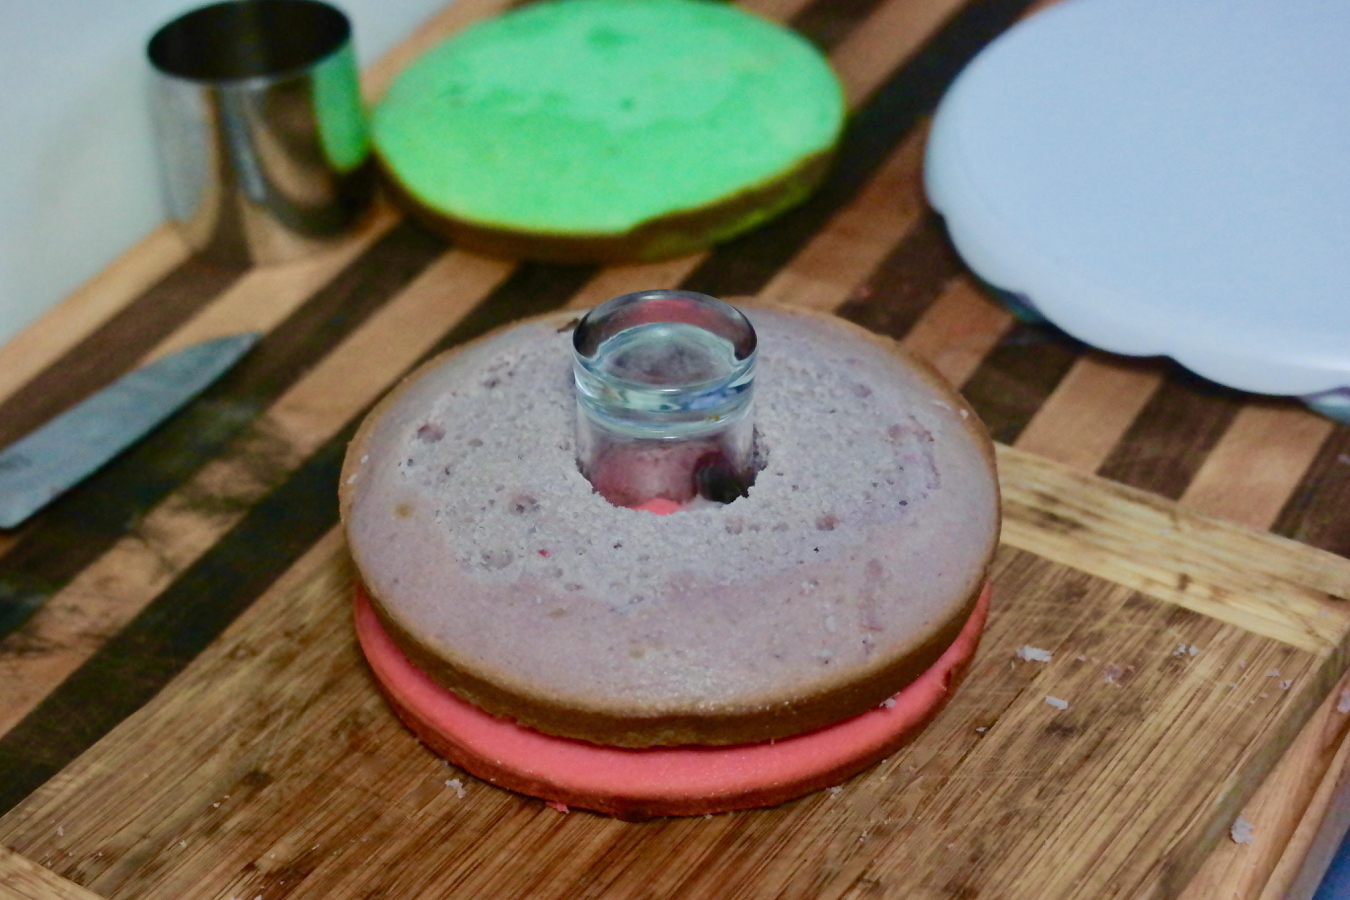
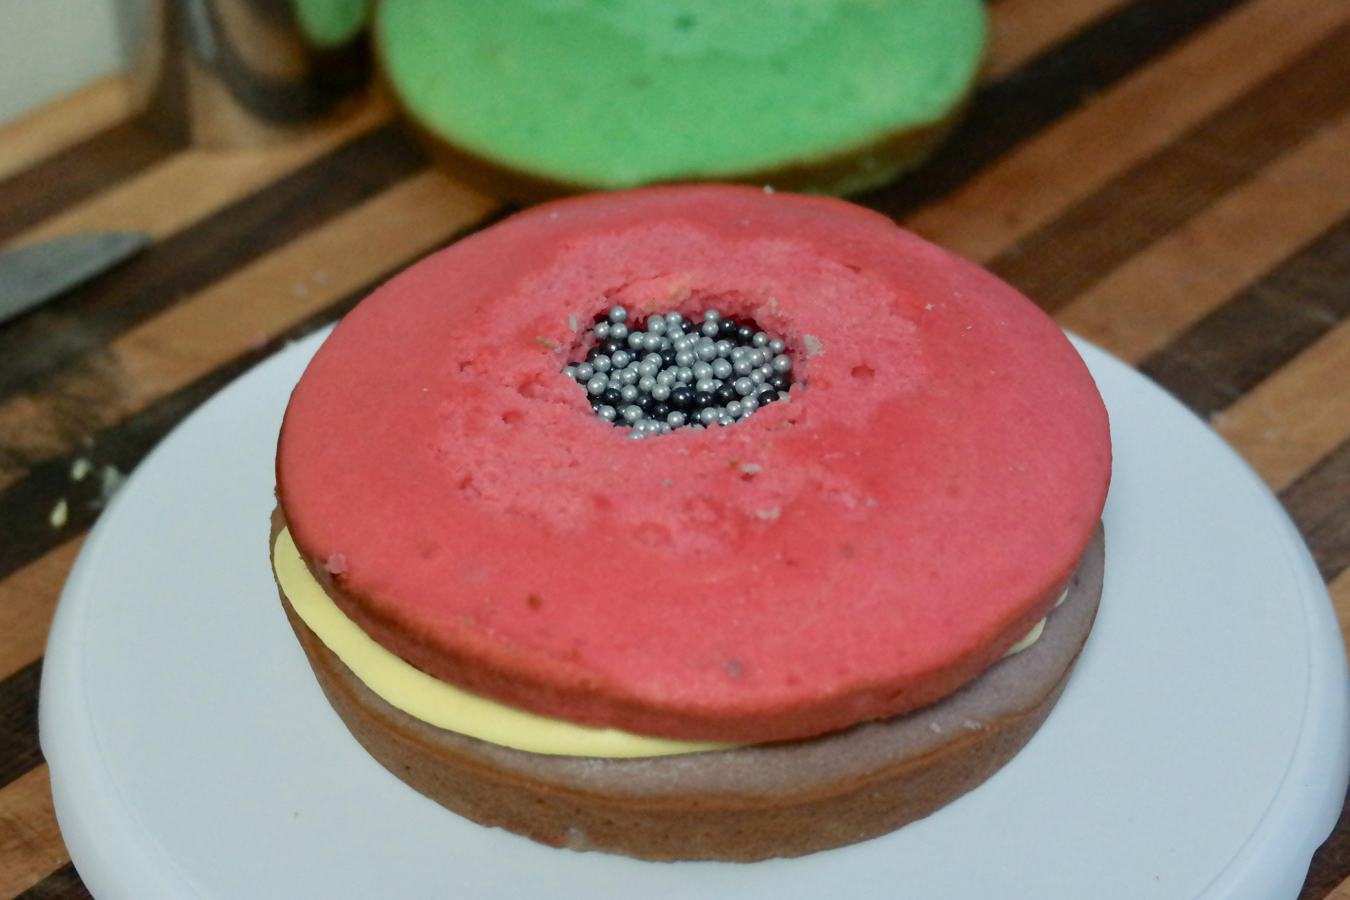
Once they’re completely cool, take a small glass and use it to punch a hole in the center of one of the cakes. Stack a second cake on top of the first one and cut a hole in that cake, making sure both holes are lined up.
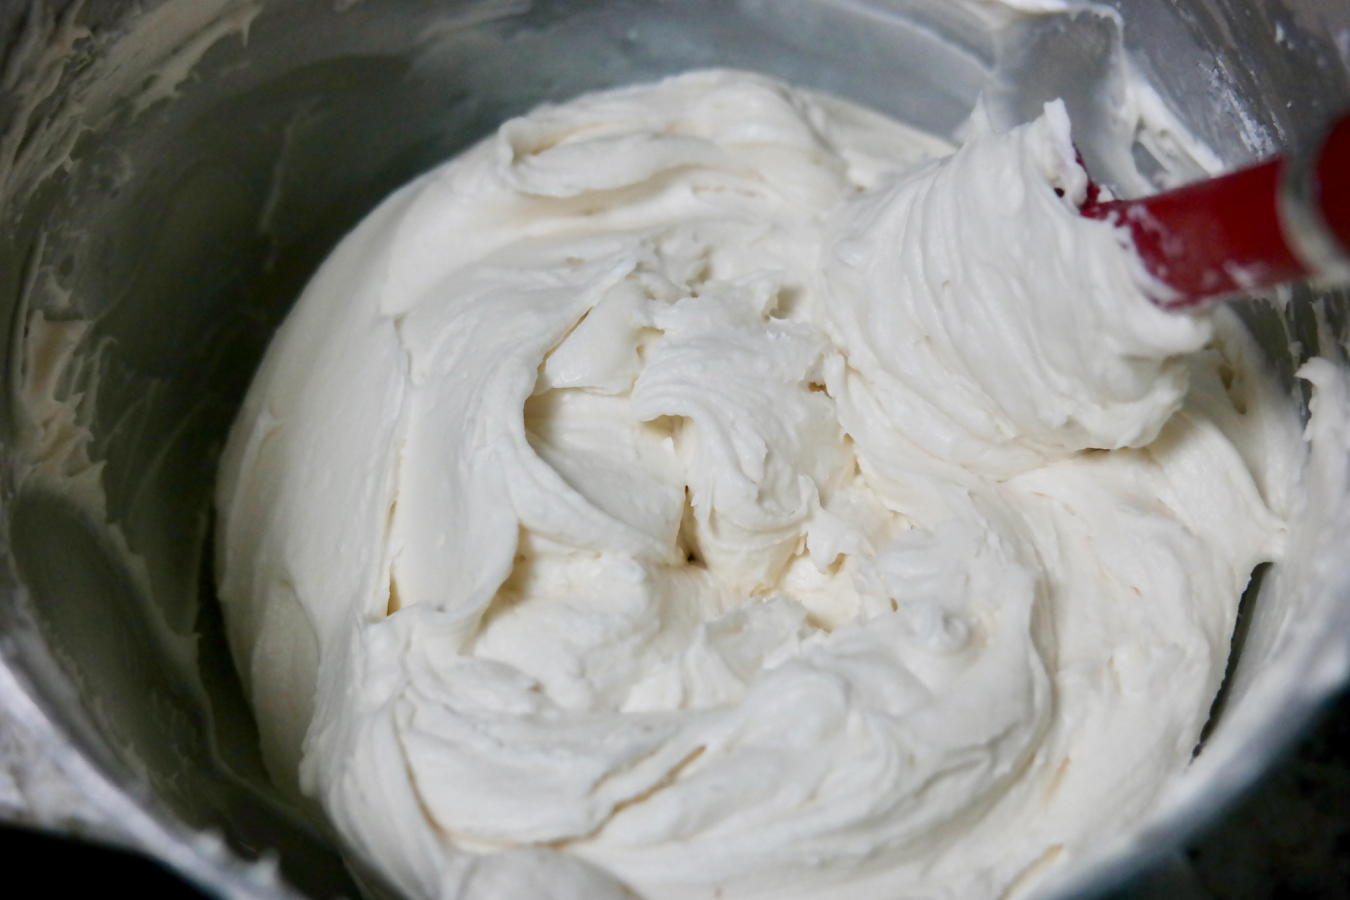
Now you can make the frosting: in your stand mixer, again with a whisk attachment, beat 2 sticks of butter at a medium speed until fluffy. Add in all of the cream cheese and a tablespoon of vanilla and beat until you have an even mixture. Then with the mixer running at a low speed, very gradually pour in all of your powdered sugar. Finally, squeeze the juice from your lemon in and beat until you have a smooth frosting.
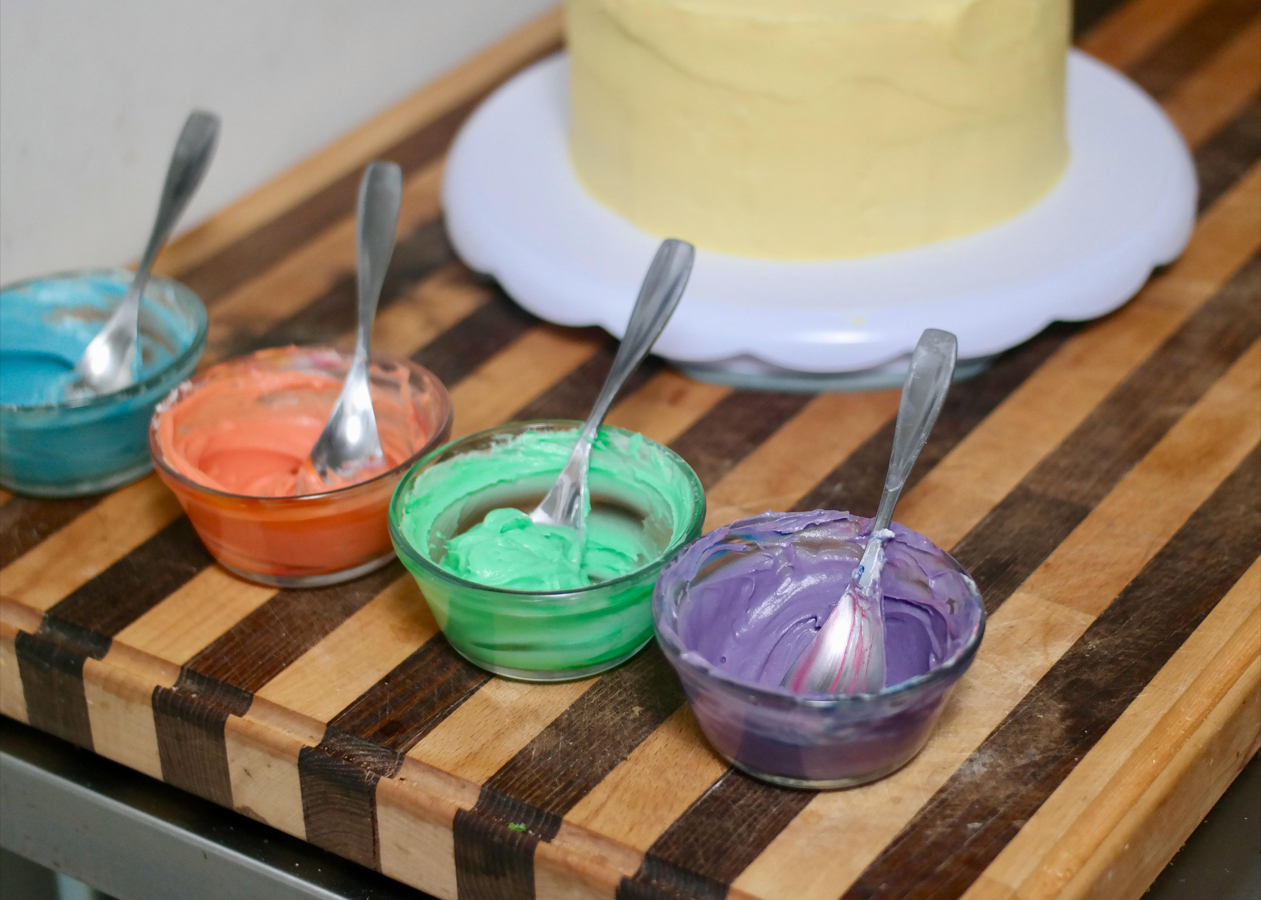
Scoop out around a cup of frosting and divide that equally among four small bowls, then set those aside. Dye the frosting that remains in your bowl whatever color you like, then scoop it into a plastic bag. Seal the bag, snip off one bottom corner, and now you have your own piping bag for the frosting.
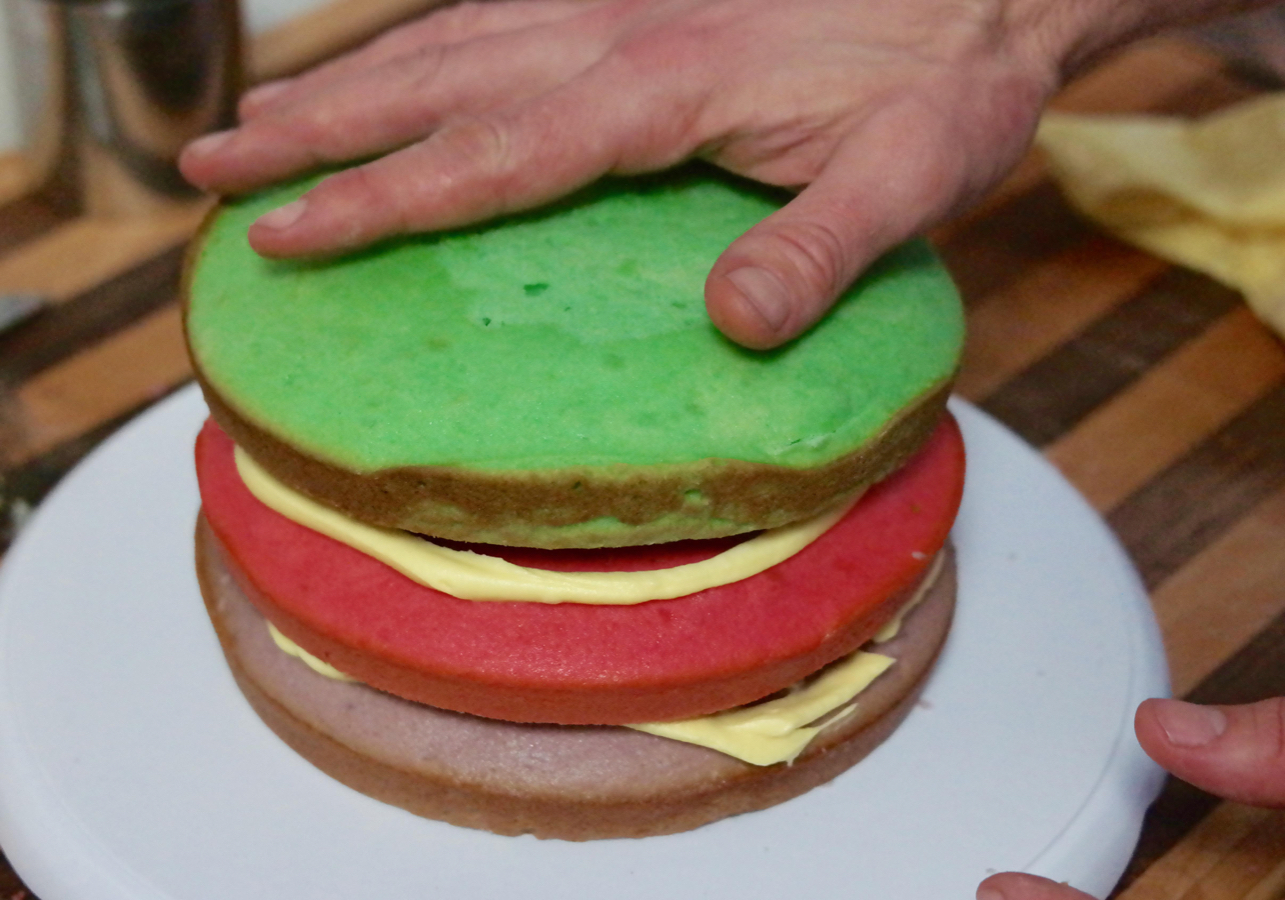
Take one of the cakes that you punched a hole in and place it on your cake stand. Pour some sprinkles into the hole and pipe a layer of frosting over the top of the cake, then place the second cut cake over it with the holes lined up and pour in more sprinkles.
Pipe another layer of frosting on top of the second cake, then put the last, uncut cake on top.
Generously frost the entire outside of the cake and use a bench scraper to smooth the frosting, but don’t worry about making it absolutely perfect.

Now take the extra frosting you set aside into four bowls and dye each one a different color.
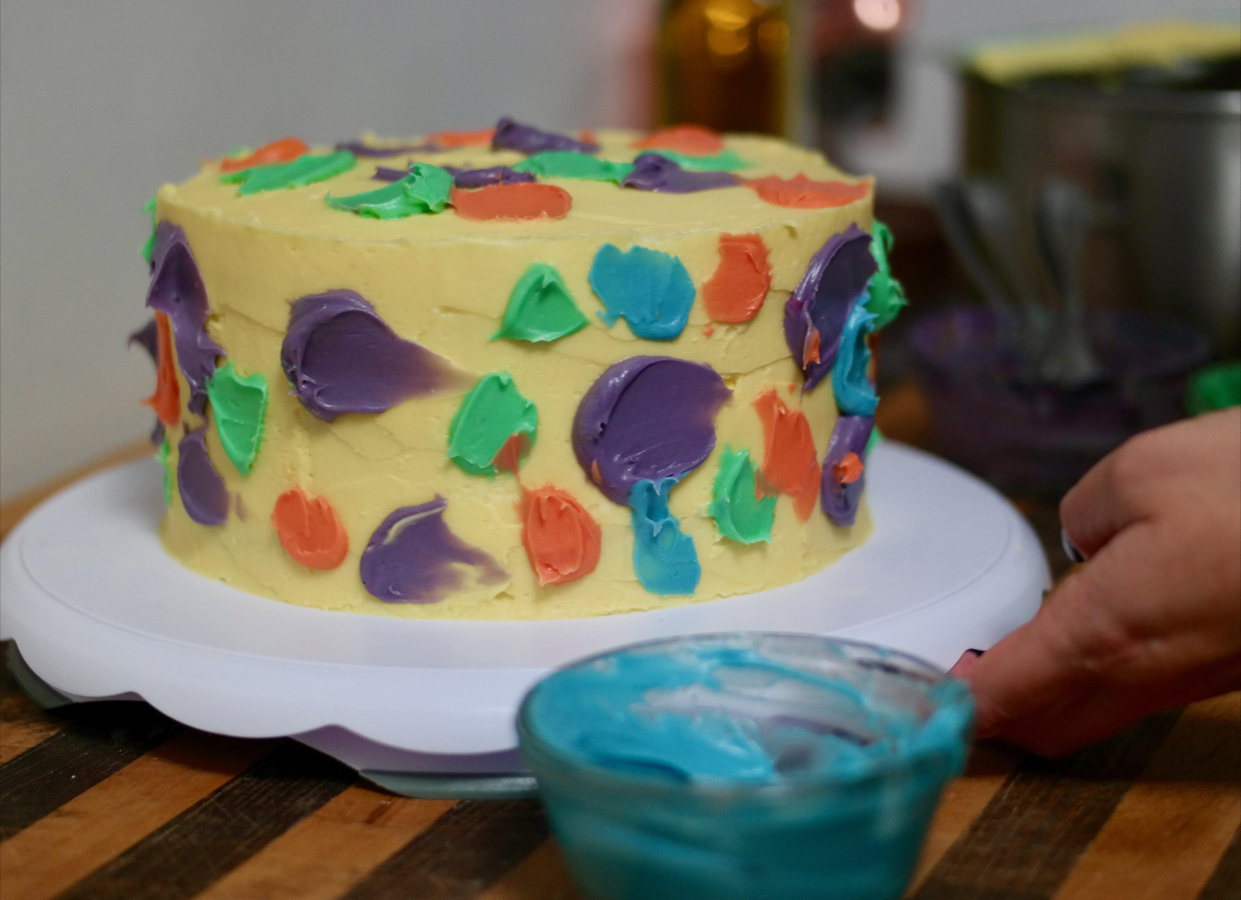
Use a spatula to add dabs of each color all around the side and top of the cake …
… then use your bench scraper to gently smear this frosting over the sides of the cake. You only want to partially blend the colors together, not fully mix them.
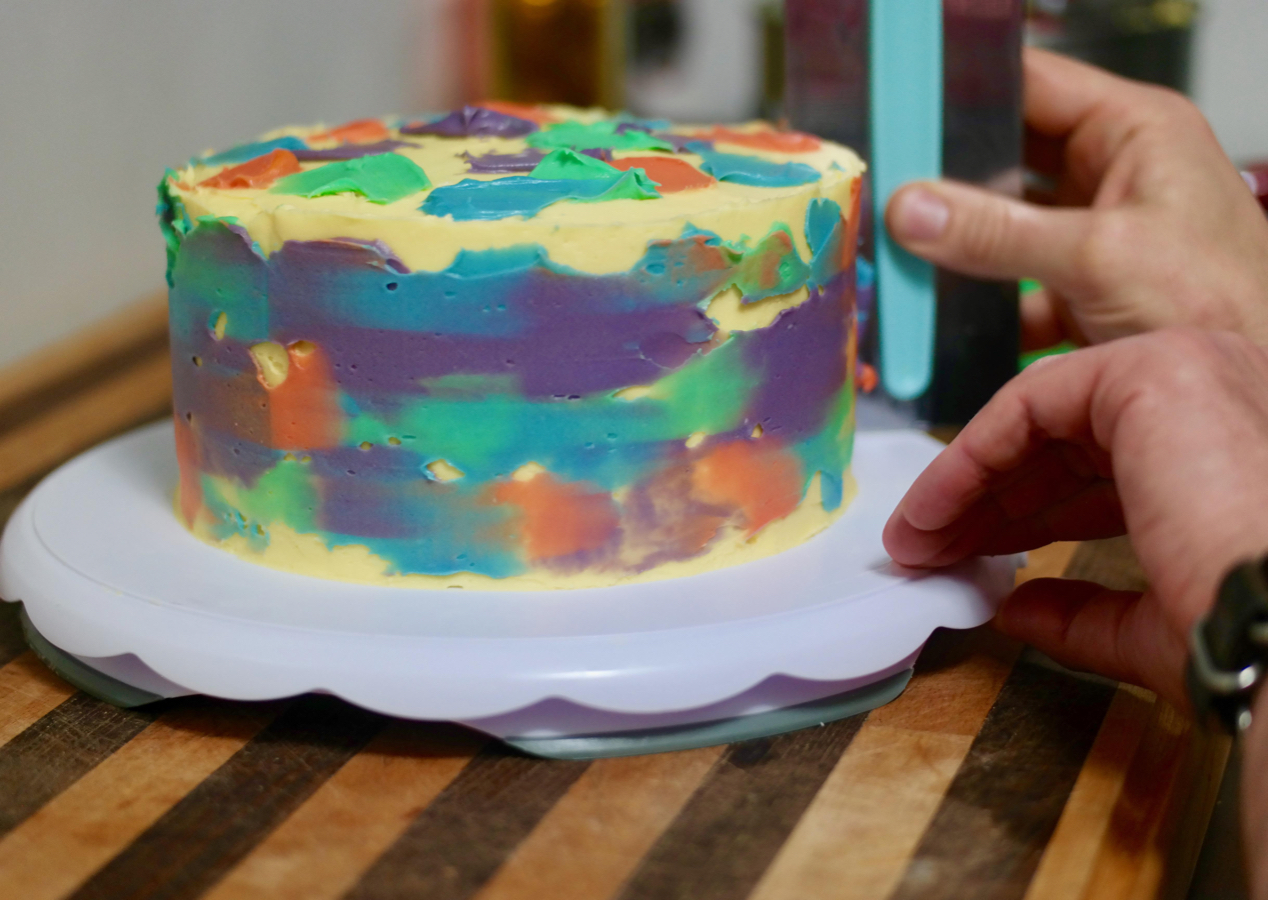
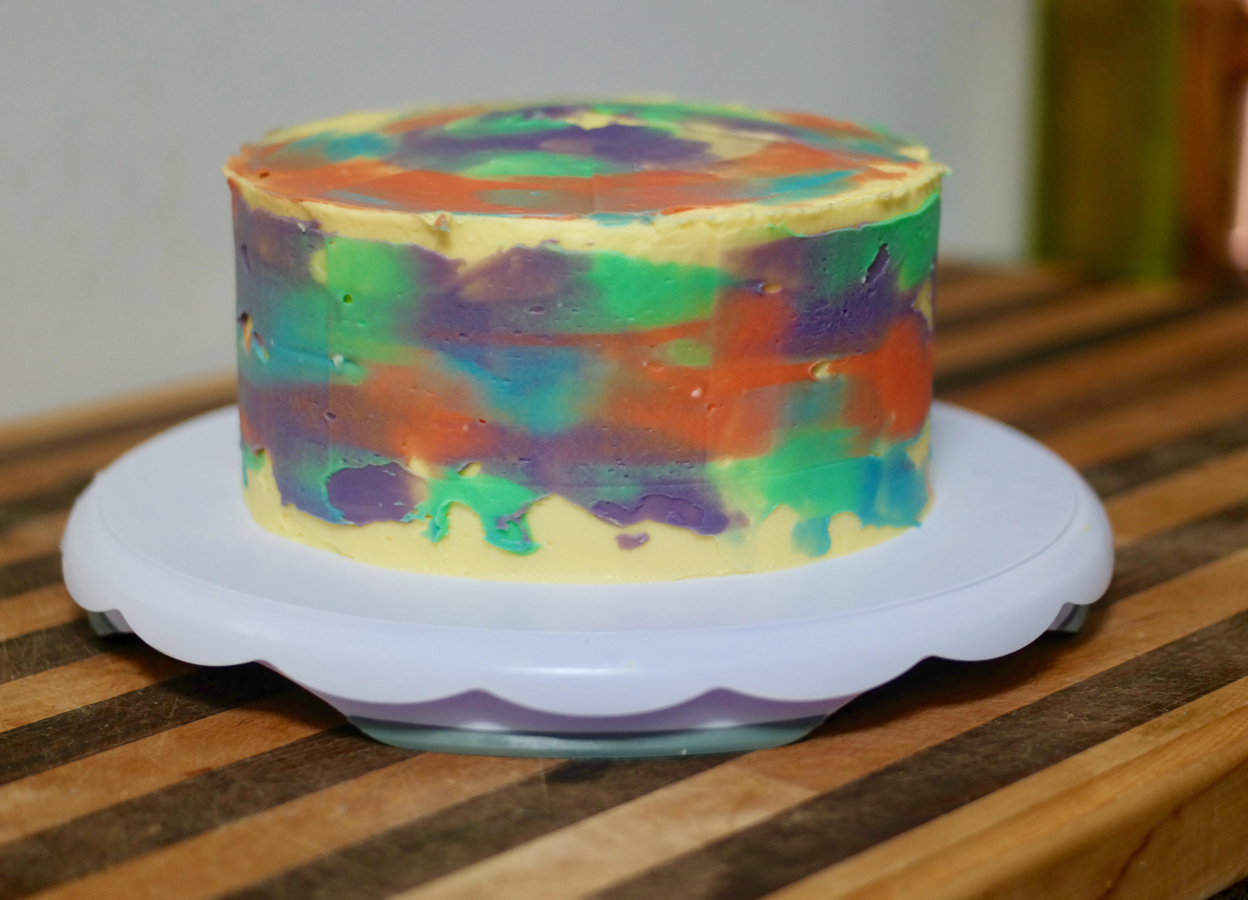
You should get a kind of tie-dye effect:
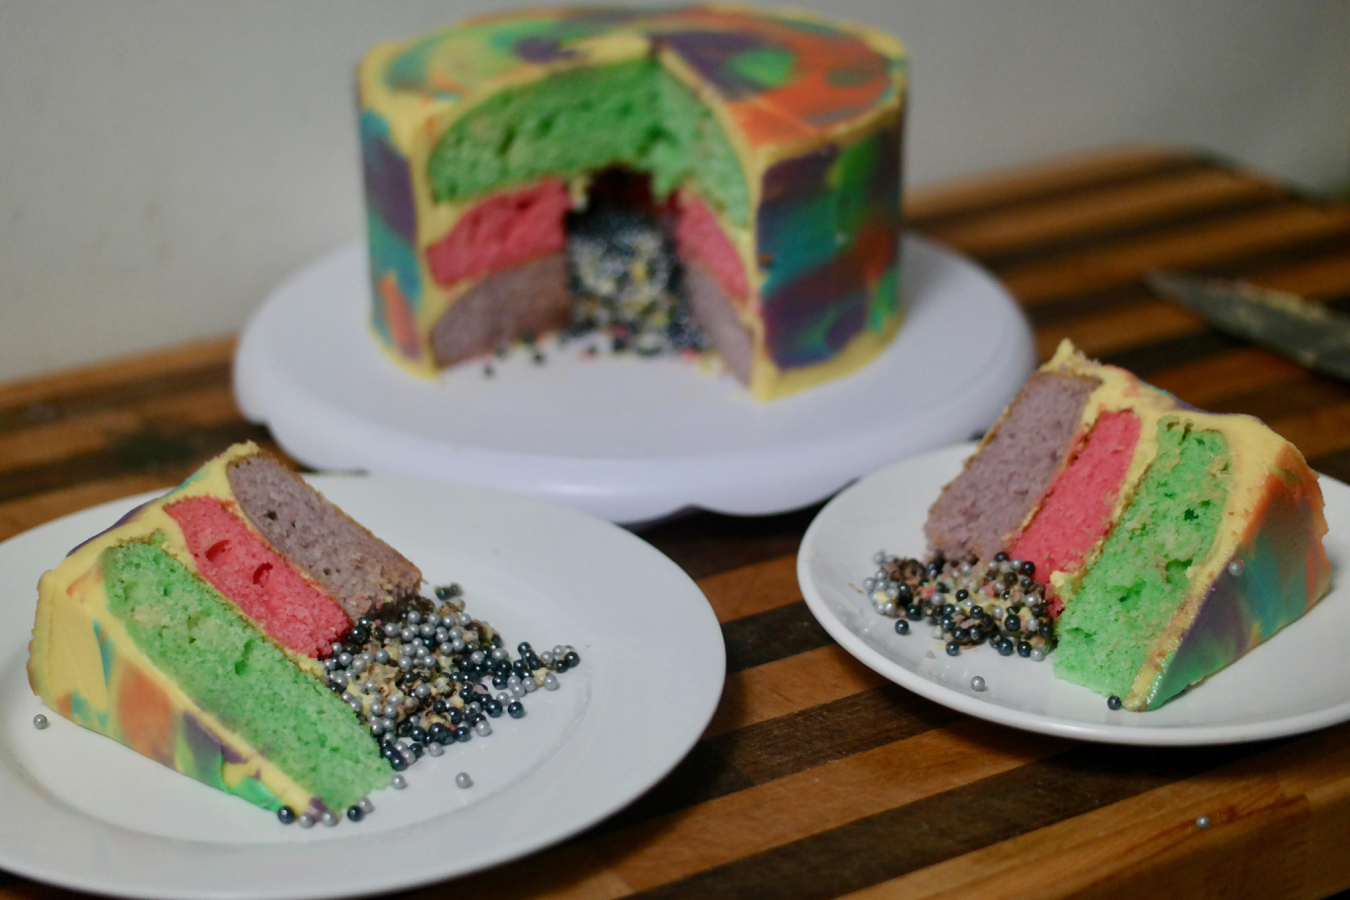
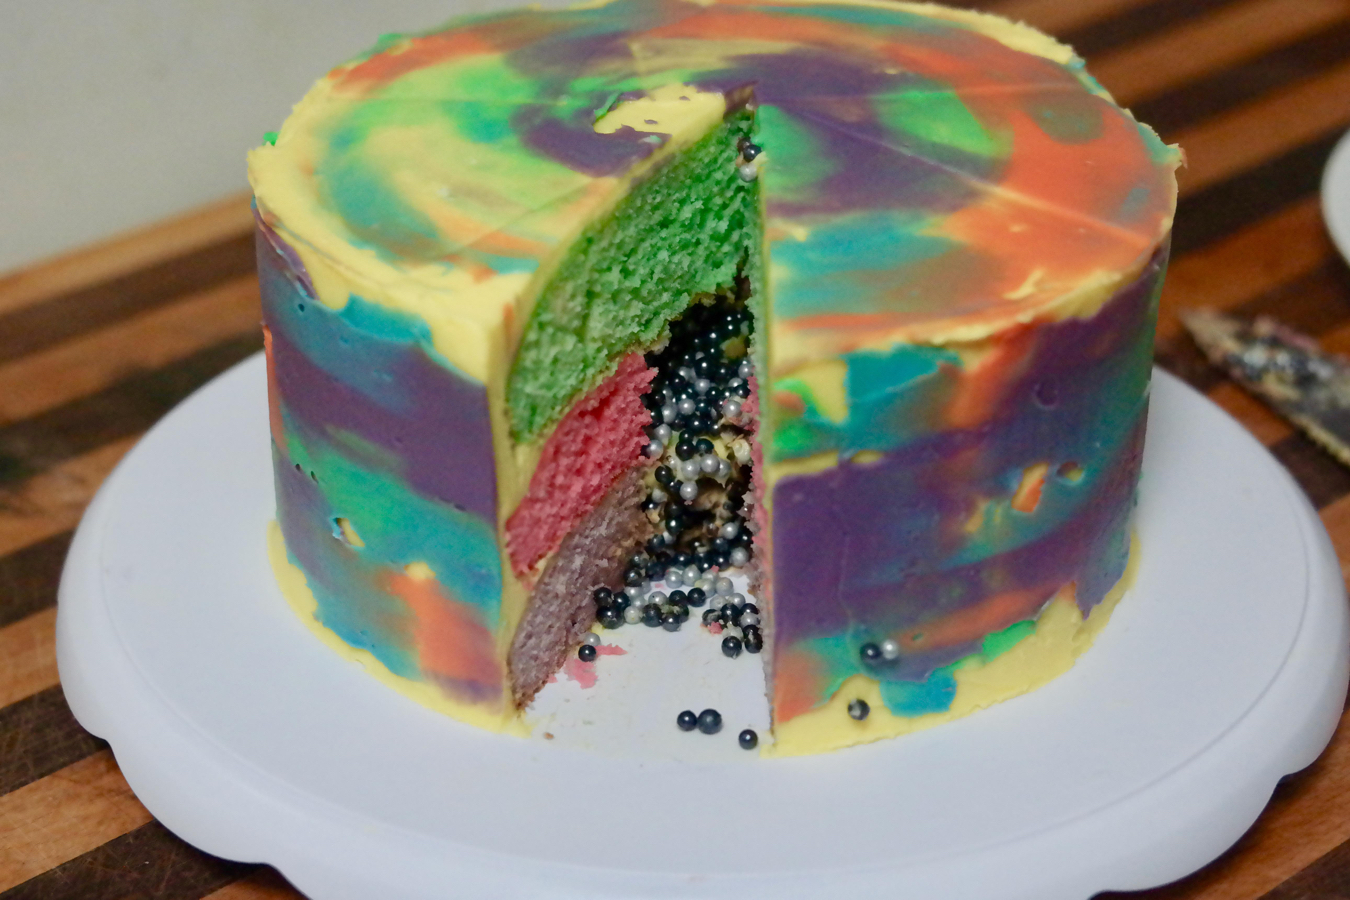
Now you can cut into the cake and see the sprinkle center.
And serve up some slices of this magnificent cake!
We really did love what we made: it’s a classic white cake with cream cheese frosting, but with so much color inside and out and some bonus goodies spilling from the center. Of course you aren’t going to want this as a weekly treat: between making and dyeing the cake batter, baking the cakes, letting them cool fully, mixing the frosting, assembling the whole thing, and doing the smeared frosting technique, this is something you can’t just whip up on a whim. We had to set aside a specific day to make this, when we knew we had some free time, and plan it out across an afternoon. But it’s fun to get extravagant sometimes, so this rainbow cake is something to try out if you’ve got time and want to experiment with baking. We certainly enjoyed both making it and eating it – the only thing we didn’t like was finding sprinkles that had rolled into random corners of our kitchen for days afterwards. We hope we’ve given you a good guide to making a cool cake, and maybe we’ve inspired you to try it for yourself.