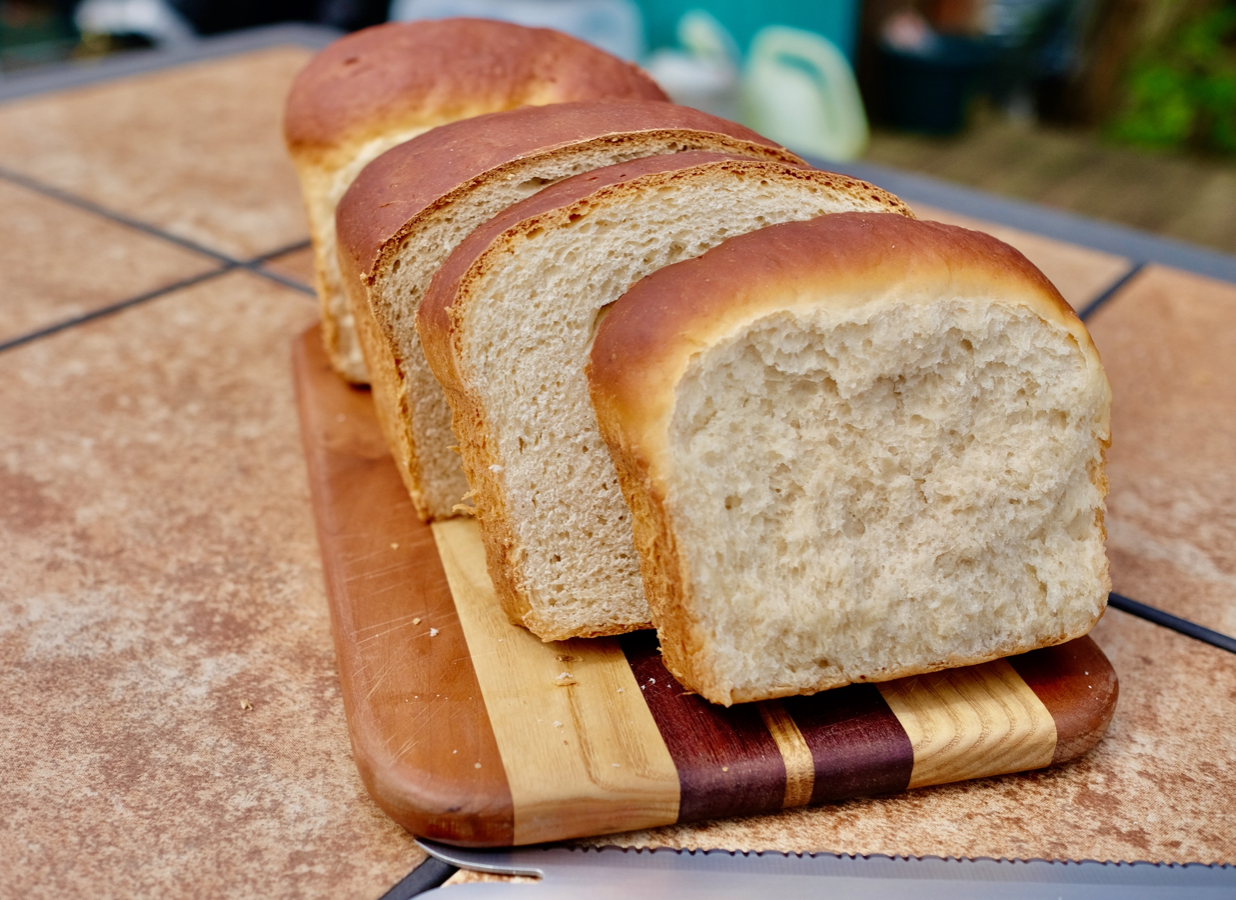
We haven’t been doing a lot of baking lately because we’ve been so focused on our new pasta-making hobby, but since it was recently Mothers Day we decided to bring something homemade when visiting Cyril’s mom, and so we took a crack at a recipe we’ve been meaning to try – this milk bread from the New York Times. It was fun to make, not least because the final product looks kind of like a butt. Rest assured, though, it’s also a really tasty version of bread, with a fun secret ingredient, and the whole family loved it. The timing here can be a little tricky, because you have to account for the dough rising in two different stages plus baking the whole thing, so in reality you’ll need to set aside at least 3 or 4 hours from start to finish. But don’t let that dissuade you, because just look at this delicious bread! We’ll walk you through the whole thing here.
To make this, you’ll need:
- Flour
- Milk
- Heavy cream
- Maple syrup
- An egg
- Yeast
- Cooking spray
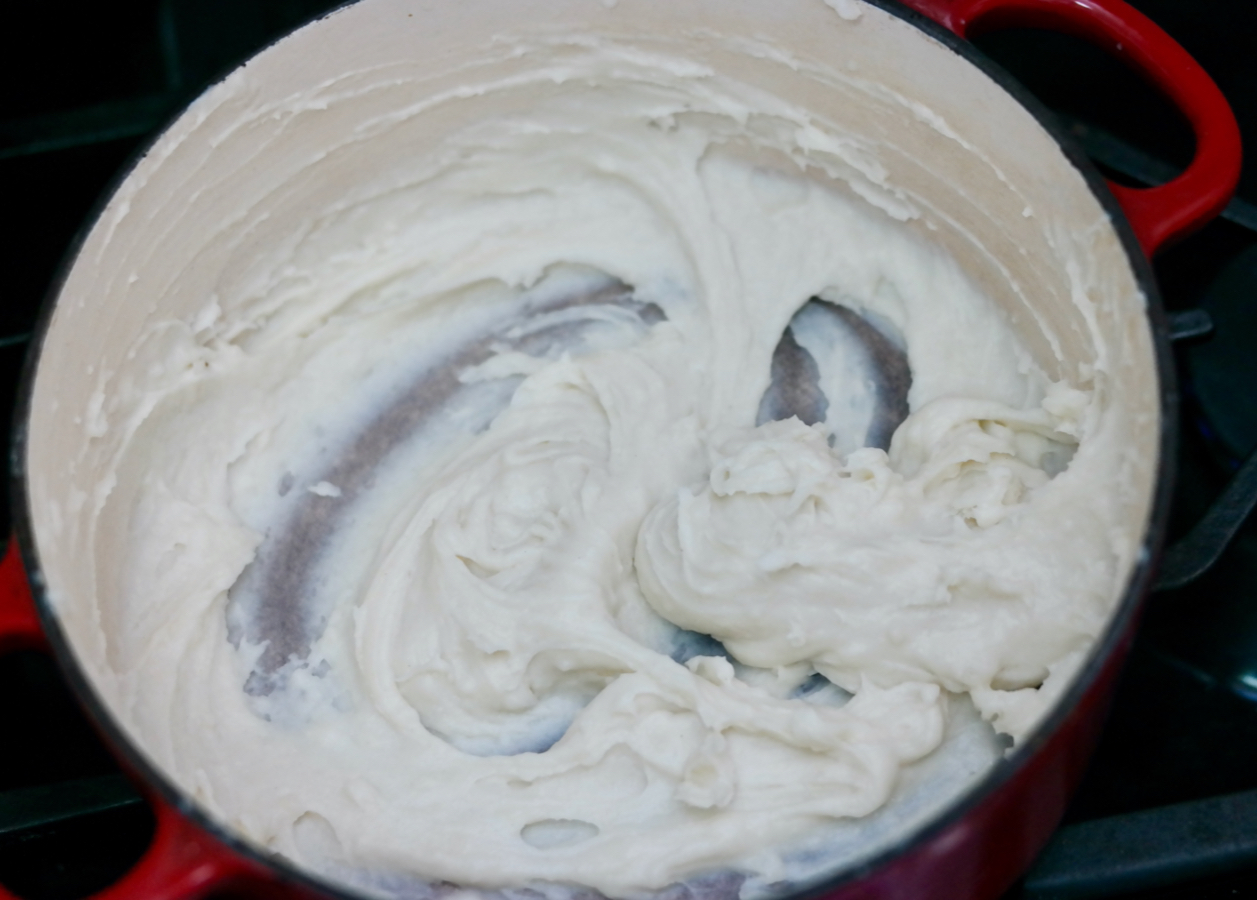
The first step is an unusual one: in a large Dutch oven whisk together 1/2 cup of flour with a cup of milk, then place the pot over medium-low heat and whisk continuously for 3 minutes until you get a creamy and somewhat thick mixture. Take the pot off the stove once you achieve that consistency and whisk in 1/2 cup of heavy cream, and it should look something like this:
Stir in 4 cups of flour, a cup of maple syrup, your egg, 4 1/2 teaspoons of yeast, and a very large pinch of salt. Once you have an even mixture, place the top on your Dutch oven and let the dough rise for an hour. When you’re ready to move on, measure out another 1/2 cup of flour and use some of that to dust a work surface. Turn out your dough onto the work surface and sprinkle a little more flour on top of it.
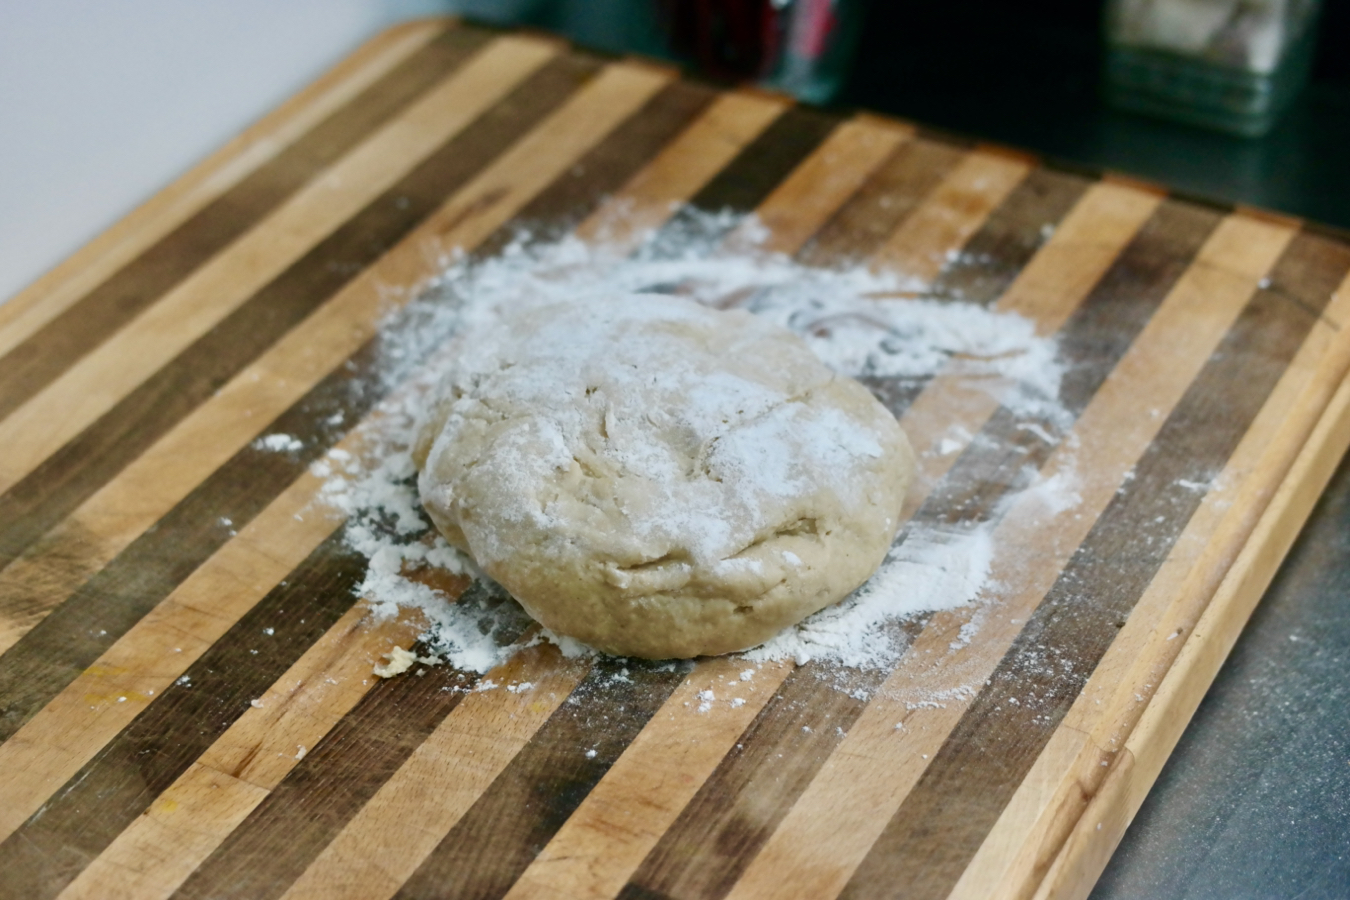
Knead for at least 5 minutes, until it’s smooth, and if the dough starts sticking to the work surface dust with more flour, but never use more than the 1/2 cup that you measured out.
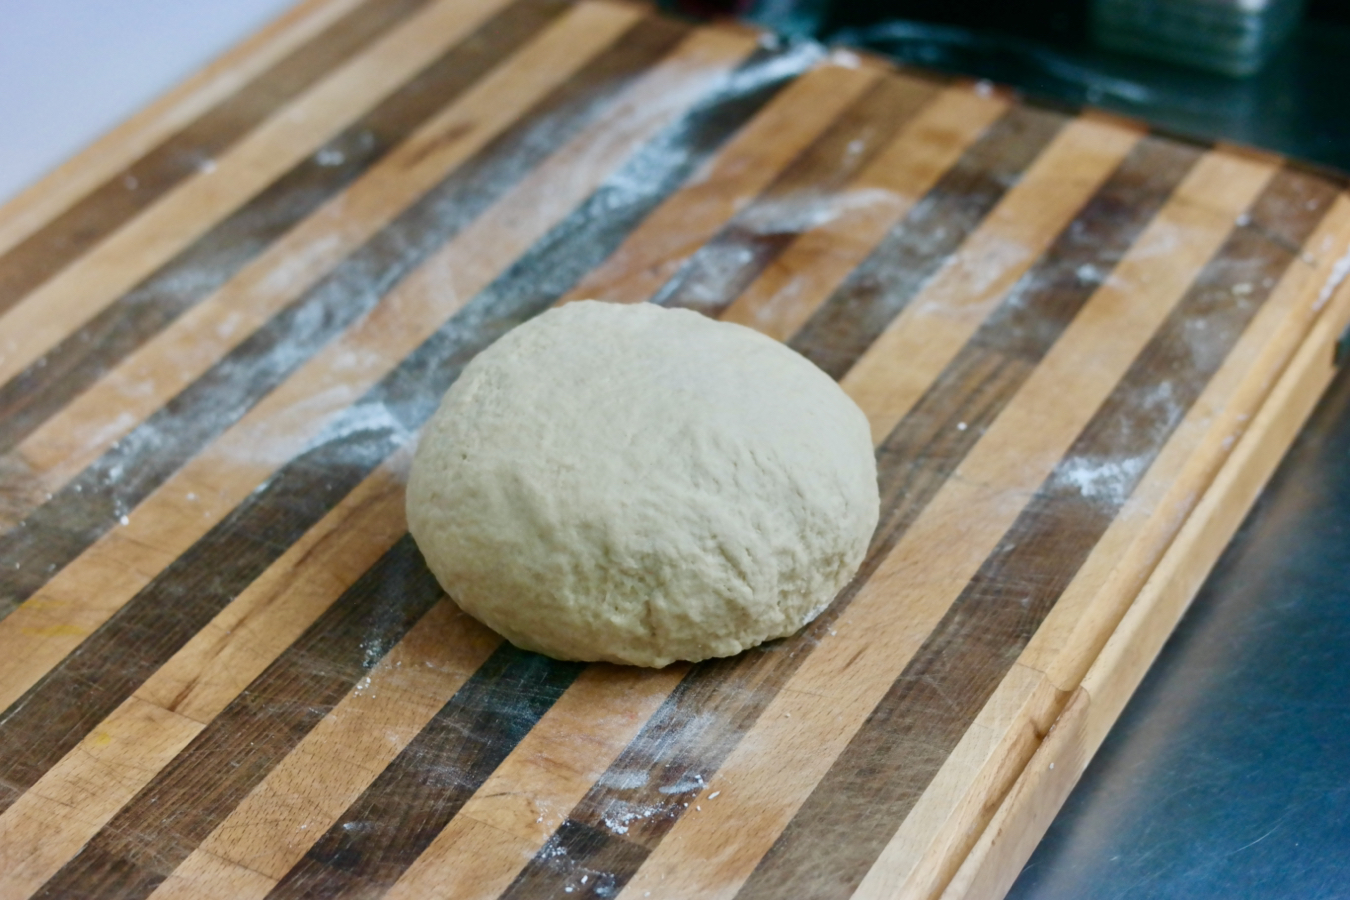
Cut your dough in half and form each half into a ball by squishing down the two pieces into discs, then taking the four corners of each disc and pulling them under and into the center and twisting them together to seal them, so you have two rounds. Take a 9-inch x 5-inch loaf pan, coat it with cooking spray, and place the two pieces of dough into it side by side.
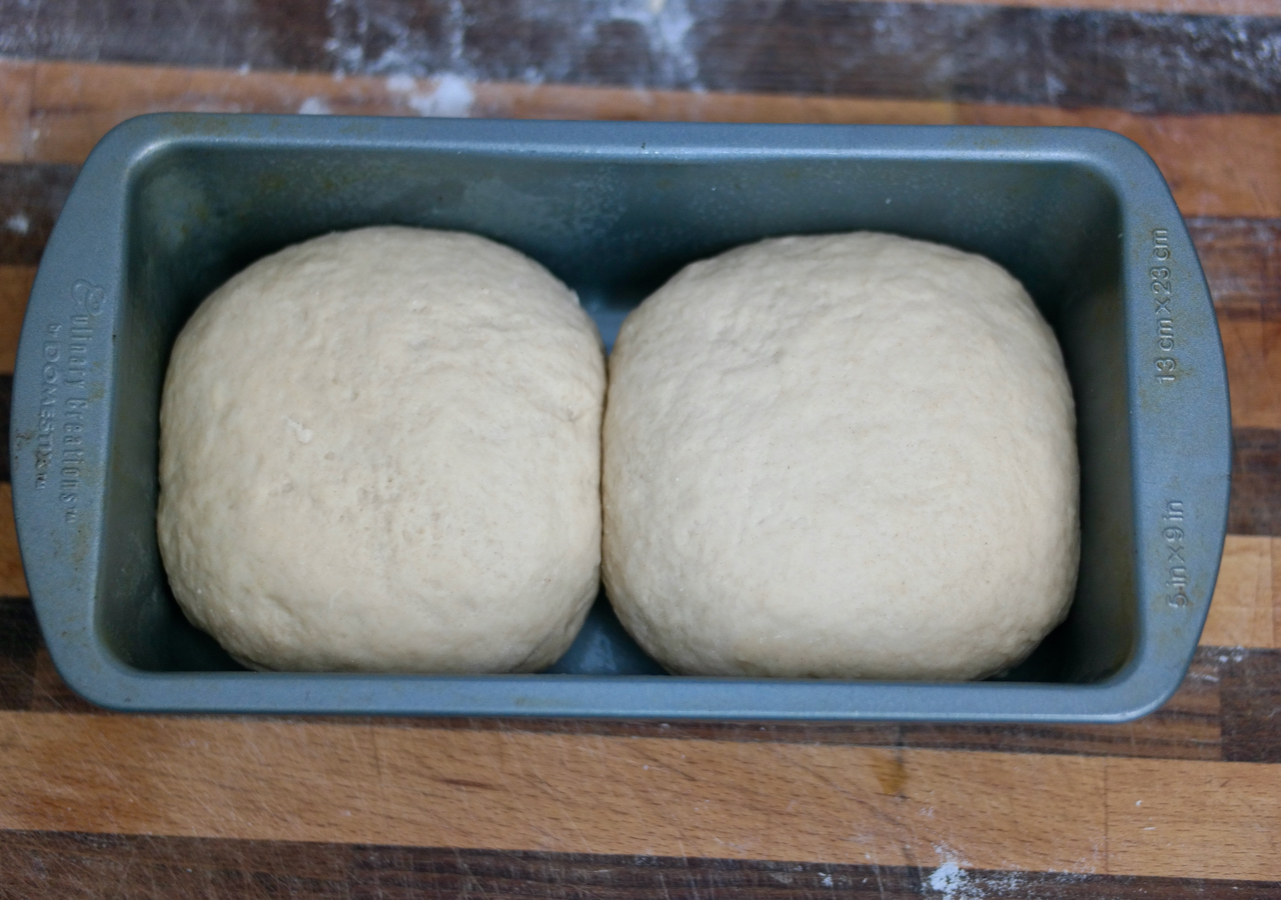
Cover the pan with a towel and let the dough rise again in a warm spot for 2 hours.
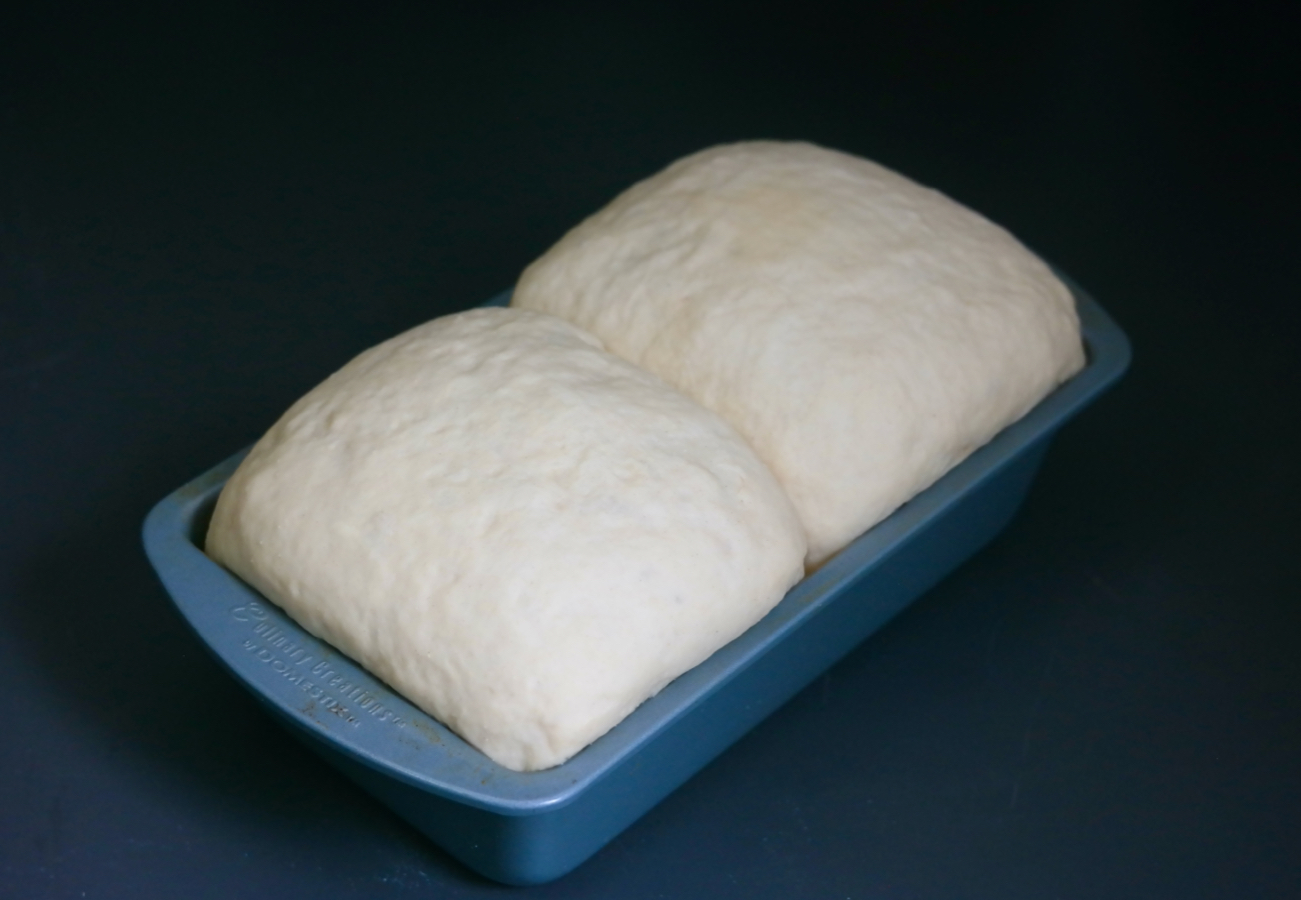
Bake the bread at 350°F for 45 minutes, until it’s well browned on top.
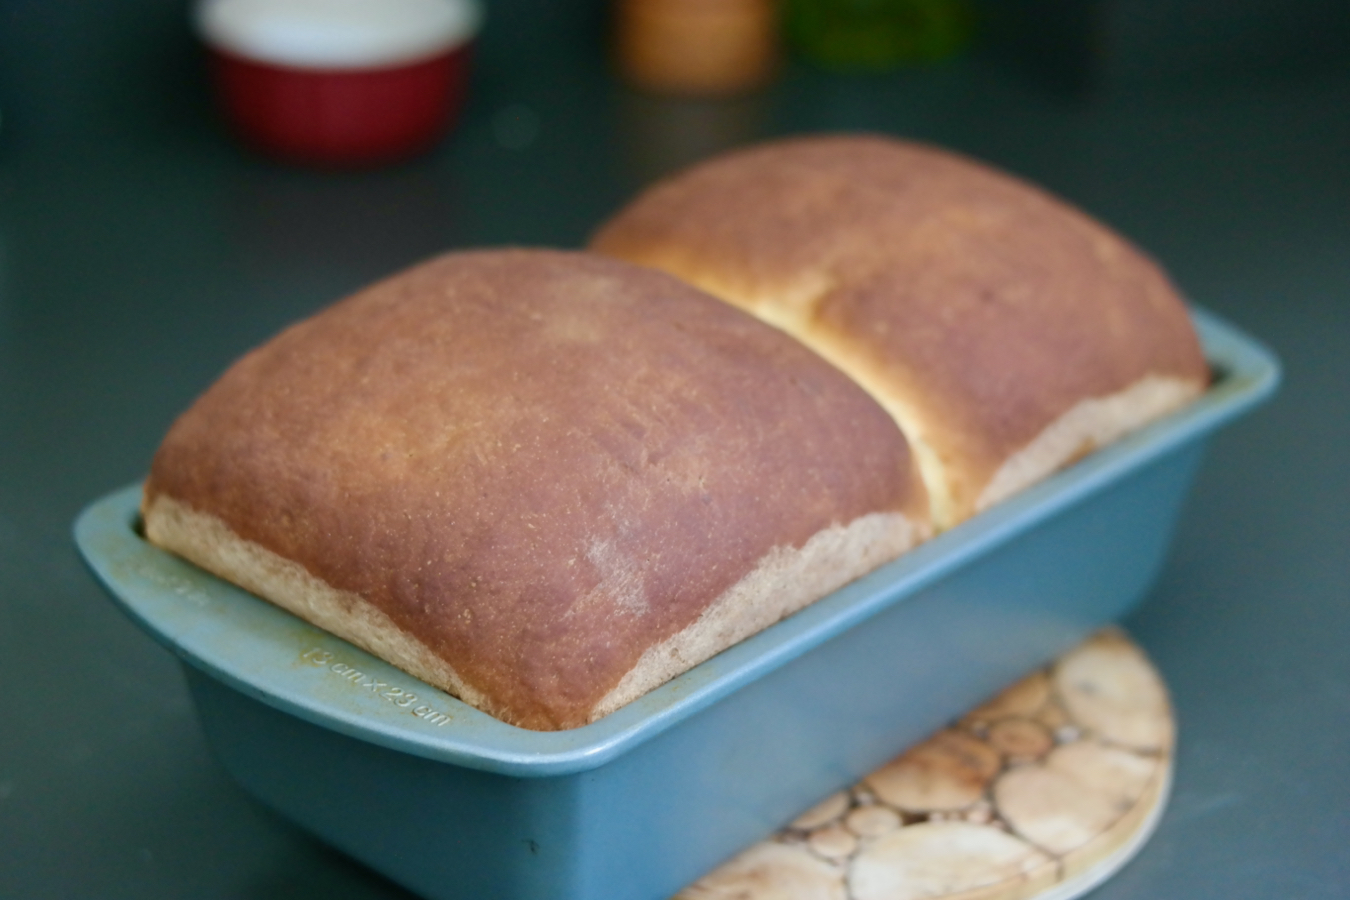
Let it cool in the pan for a few minutes, then you can take it out …
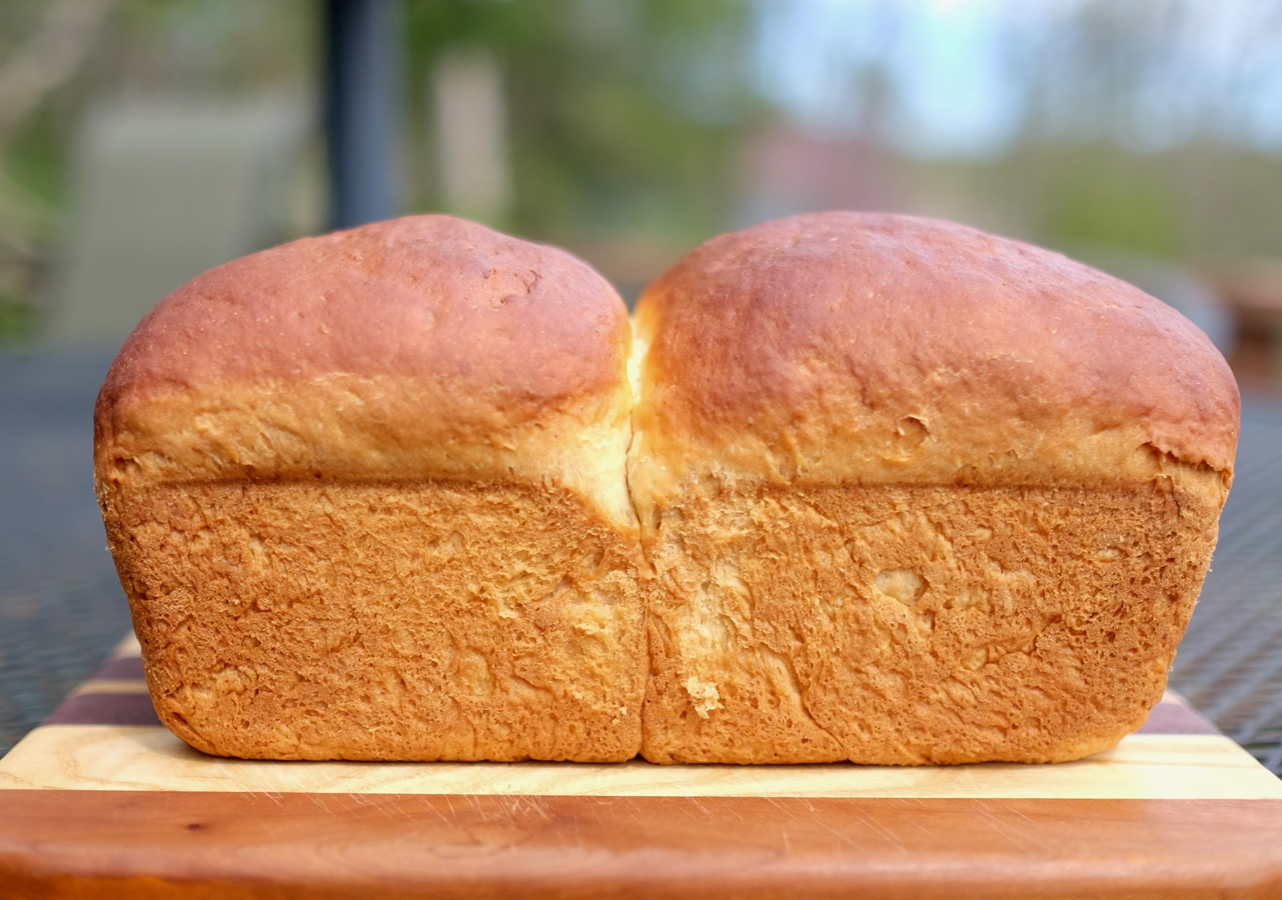
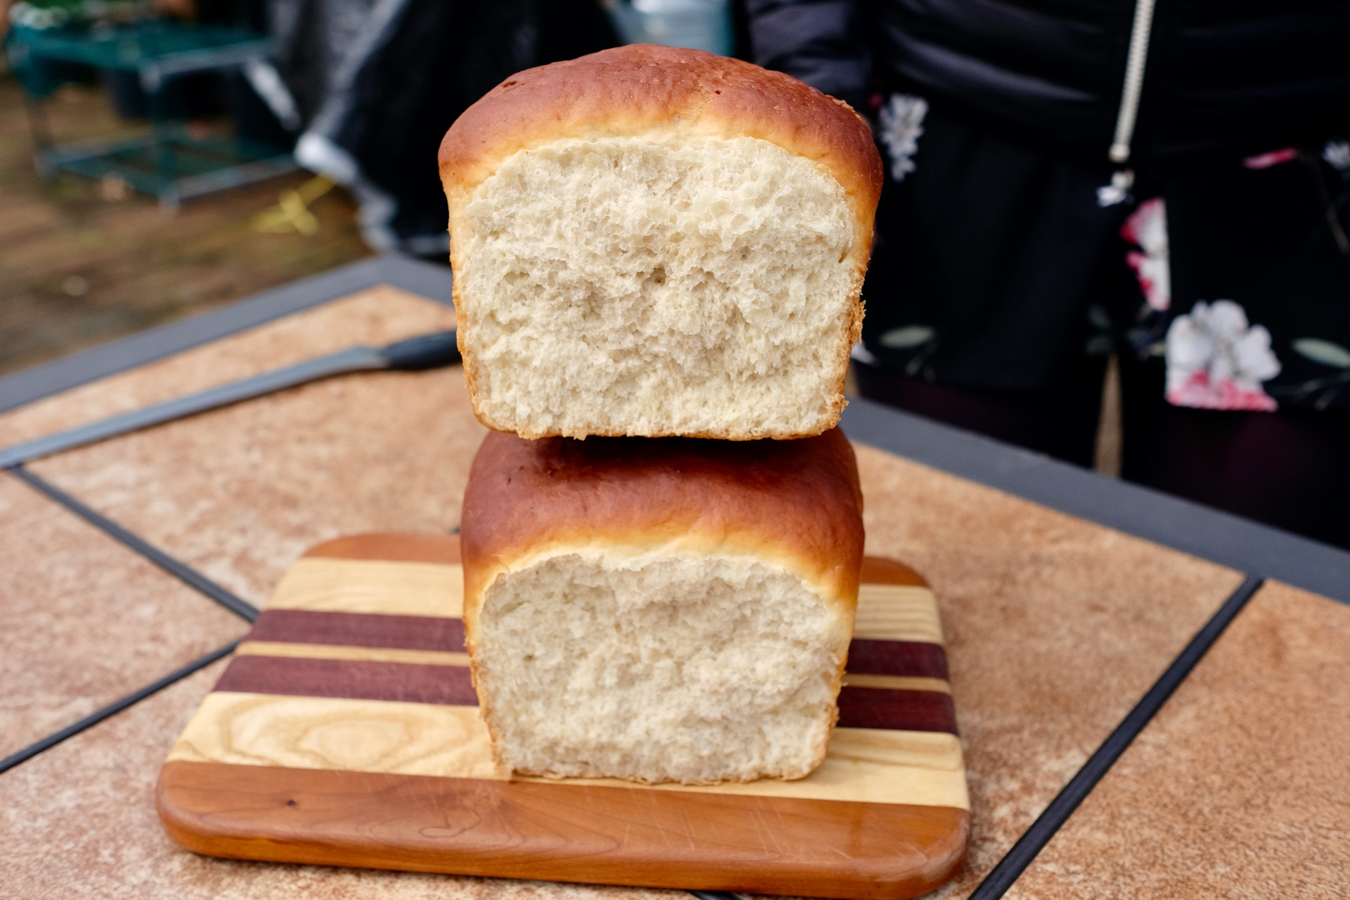
… break it in half …
… slice it …
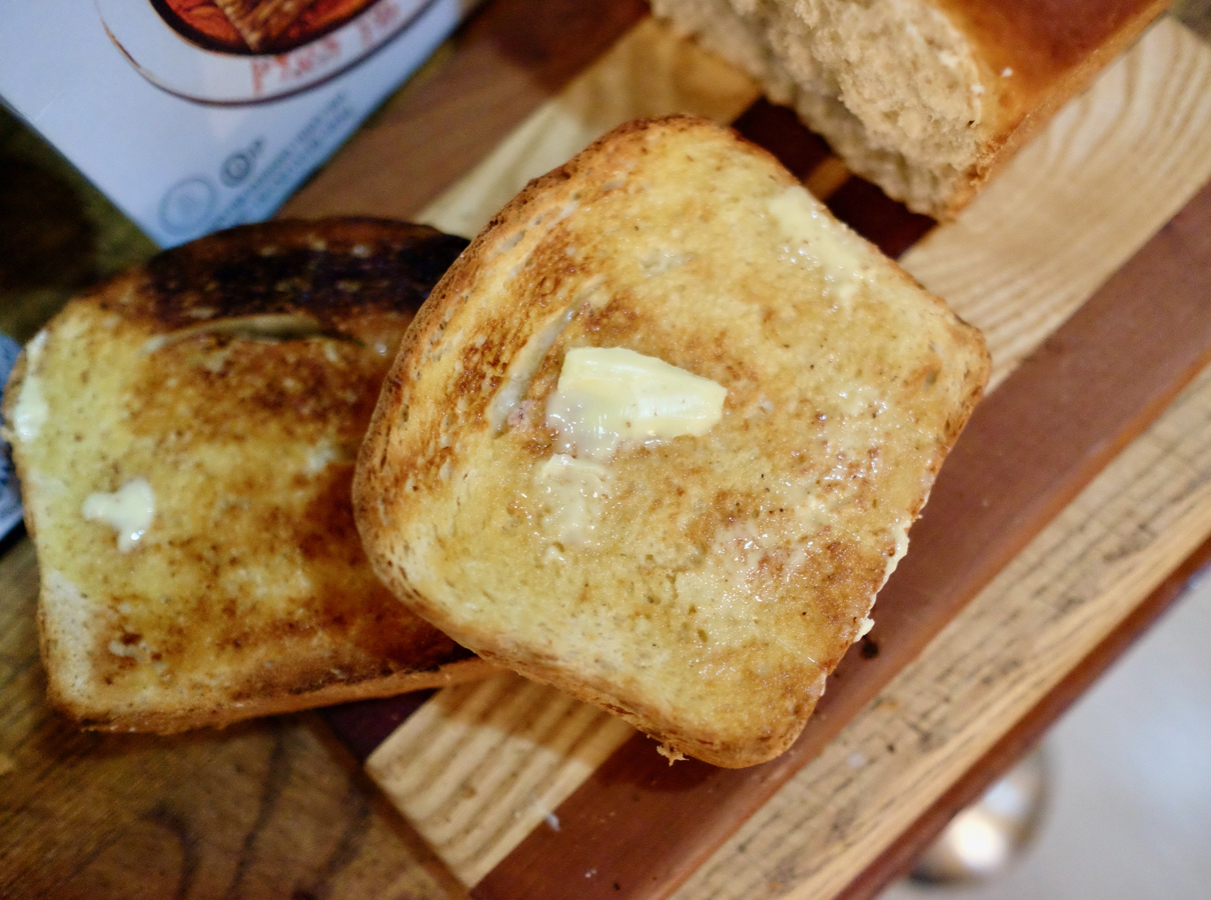
… and eat it! We toasted the bread and then spread some butter on top.
Making this bread isn’t too difficult – it’s just some stovetop cooking, mixing, and then a little bit of kneading. The one part that’s difficult is getting the timing right, because you’ll have to plan for an hour of rising, then two more hours to rise later on, then 45 minutes of baking – so you need to pace this out or else you’ll be scrambling to get the bread done on time. But after all that, you’ll end up with a beautiful, browned, and puffy loaf of bread, which not only tastes great but also looks pretty darn impressive (and like a butt). Don’t let the multiple steps intimidate you, because this is definitely a fun and tasty baking project!